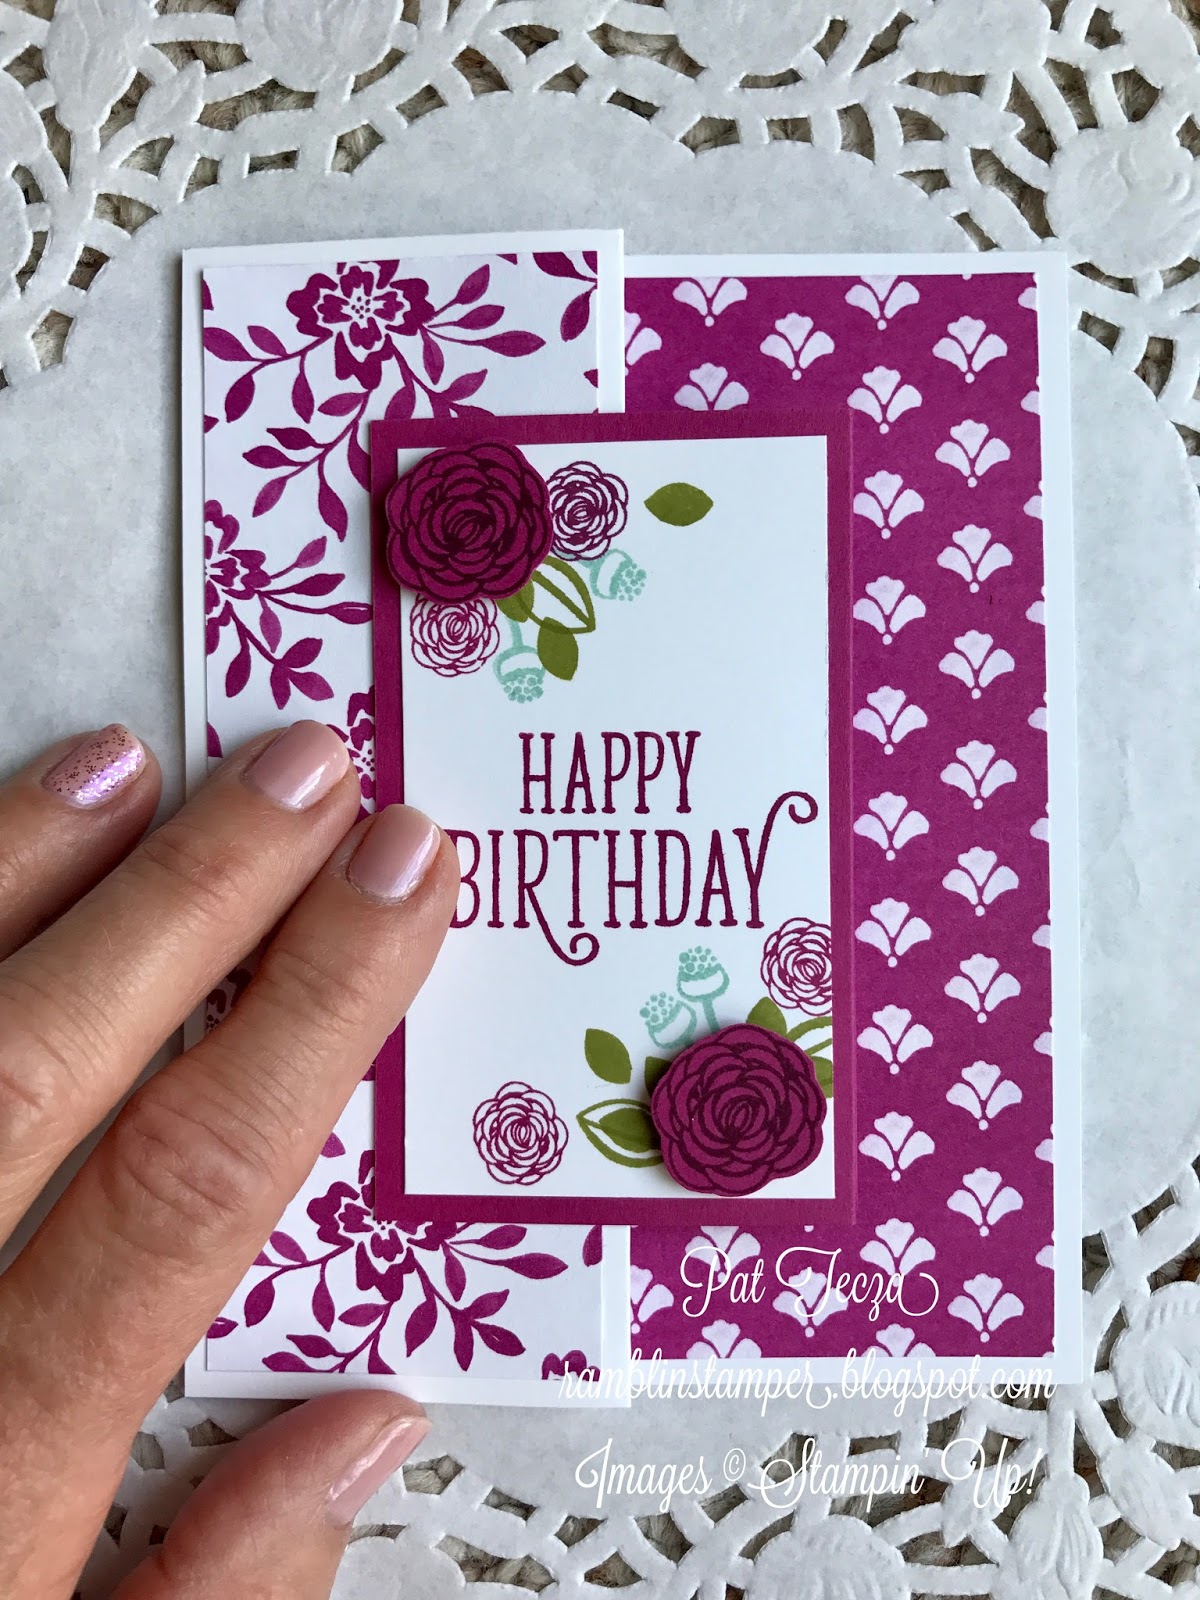
I hope you're having a good summer! I've been slow in posting projects lately, as I just came back from a trip to visit my son in California. What a great time we had - more on that later. Here's my newest project - a fancy fold in one of my favorite new In-Colors, Berry Burst.

Love that Berry Burst - it pairs so well with Rich Razzleberry, Old Olive & Pool Party! The designer paper is from the Fresh Florals stack.

Here's an expanded view showing the front and back panels. The lovely inside greeting comes from the Special Celebrations stamp set.
There are several things I love about this card. First, it's impressive without being a lot of work! The stamping is just on the 2 panels - everything else is adhering designer papers! Second, it folds nice & flat and fits in a standard A2 envelope for easy mailing. And third, well, it's just fun to make!

The top view gives you a good idea of why it's called a Double Z fold - can you see it?
Here are the pieces you'll need to re-create this card:
Whisper White cardstock 8-1/2" x 5-1/2" - score at
2-1/8" & 4-1/4"
Whisper White cardstock 3-1/2" x 2"
Whisper White cardstock 3-1/2" x 1-7/8"
Berry Burst cardstock 6-1/2" x 3-3/4" - score at
2-1/8" & 4-1/4"
Berry Burst Fresh Florals DSP 5-1/4 x 4"
Berry Burst Fresh Florals DSP 5-1/4" x 1-7/8"
Berry Burst Fresh Florals DSP 3-1/2" x 1/7/8"

Adhere the designer papers as shown here to the Whisper White card base. Fold as shown.

Adhere the third piece of designer paper to the Berry Burst card inside. Wait to fold until after you've attached the stamped panels.

Stamp the front Whisper White panel (3-1/2" x 2") as desired. I used the Happy Birthday Gorgeous stamp set for this card. The 2 largest flowers were stamped on Berry Burst cardstock using Rich Razzleberry ink and fussy cut. The rest of the leaves & flowers were stamped using Berry Burst, Rich Razzleberry, Old Olive & Pool Party. After you finish stamping this piece, go ahead & attach it to the front of the Berry Burst cardstock. Add the 2 largest flowers last, using Stampin' Dimensionals to pop them up.

The inside panel is stamped with the birthday greeting from Special Celebrations. I added one flower stamped in Berry Burst and fussy-cut so I could layer it over a few leaves.
All that's left now is to attach the Berry Burst inside "Z" section of the card to the larger outside "Z". Starting without any adhesive, layer the 2 pieces together the way they will look when the card is finished, like this (above).

Keeping everything in place, just flip open the front panel & place some double-sided adhesive tape as you see it here. Tear & Tape works great for this, or any other strong double-sided tape you have on hand. You will definitely want to use this type of adhesive because these pieces need to hold strongly when the card opens and closes. Now peel the backing from the tape and close the flap and press down firmly.

Now flip the card open and place tape on the back panel as you see it in this photo. Peel the backing from the tape, close the card back and press firmly. You're done!

I also stamped a few leaves and flowers in the corners of my envelope (of course)! I hope you'll give this card a try - I think you'll be surprised at how easy it is after you make the first one. Check back next week for more Double Z Joy Fold cards!
Product List

I love a bargain. I never, ever pay full price for anything. That's the main reason I purchased my Stampin' Up Starter Kit - to save money on my craft supplies. The Christmas in July incentive is the best I've ever seen - there will never be a better time to join! For only $99 with free shipping, you get to choose $125 worth of product. It's totally your choice - you may decide to complete your collection of inks, or add to your rainbow of cardstock colors. Maybe you just have your eye on some of the gorgeous stamp sets in the catalog. Whatever you choose to fill your kit with, if you join by July 31, you'll also get a free Essentials Gift Pack including the following items:


Carols of Christmas is brand-new and not available yet (unless you're a demonstrator - another great perk)! After your initial $99 purchase, you'll enjoy discounts of at least 20% on all your future purchases, as long as you maintain your $300 quarterly sales minimum (which, at a 20% discount will only cost $240)! There are no other requirements - if it doesn't work out you simply cease being a demonstrator and lose the perks. Whatever path you take, the choice is yours - you might decide to have home workshops, classes, stamp with friends, sell finished products at craft fairs, or just enjoy the discount for yourself.


Product List


I love a bargain. I never, ever pay full price for anything. That's the main reason I purchased my Stampin' Up Starter Kit - to save money on my craft supplies. The Christmas in July incentive is the best I've ever seen - there will never be a better time to join! For only $99 with free shipping, you get to choose $125 worth of product. It's totally your choice - you may decide to complete your collection of inks, or add to your rainbow of cardstock colors. Maybe you just have your eye on some of the gorgeous stamp sets in the catalog. Whatever you choose to fill your kit with, if you join by July 31, you'll also get a free Essentials Gift Pack including the following items:


If you're ready to go for it, click the link below to join my team! You'll need a credit card to keep on file for purchases, a bank account for direct deposits of income from any customer orders, and your Wish List.
Still have questions? I'm here to answer them for you. Just email me - ramblinstamper@gmail.com
Another great promotion going on this month is Bonus Days - for every $50 you spend in July (before tax & shipping), you earn $5 to spend on anything in August. Click on the link below to start shopping with me now!
Some pics from my trip - that's me with my handsome son in the Botanical Gardens at Tilden Regional Park in Berkeley, CA.


Have a great weekend!
Pat
No comments:
Post a Comment